
Via ferrata Ivano Dibona used to be the ultimate experience for adventurers in the Italian Dolomites. Who wouldn’t want to walk on the same suspension bridge Sylvester Stallone himself did when shooting the Cliffhanger movie? In 2016, the gondola providing easy access to the start of the route closed indefinitely, significantly slowing down traffic. Today, only those with enough stamina give Via Ferrata Ivano Dibona a go.
Total round-trip distance
8.5 kilometres / 5.3 miles
Elevation gain
900 meters / 2950 feet
Difficulty
Intermediate (B)
Time required
6-8 hours


Overview of the via ferrata Ivano Dibona
The Via Ferrata Ivano Dibona is a classic, historic route in the Cristallo group above Cortina d’Ampezzo in the Italian Dolomites. It follows a high mountain ridge with dramatic views and passes numerous remnants of First World War military positions. Its most famous feature is the roughly 30-meter Ponte Cristallo suspension bridge, made famous by the film Cliffhanger.
Overall, this is not an overly technical via ferrata; however, you shouldn’t underestimate its remoteness. It is less about difficult climbing and more about a long, exposed high-altitude mountain traverse. It’s best suited to experienced hikers/ferrata walkers who are comfortable with exposure and a full day in the mountains. With all breaks included, it took me over 10 hours to complete this route.
The map & elevation profile
Important info about the via ferrata Ivano Dibona
You should expect to hike for at least 6-8 hours (not including breaks). Plan accordingly and pack enough water, a hat, and sunscreen. The route is exposed to the sun in many places. I also recommend bringing lightweight hiking poles, which you can easily stow away. You will be thankful for them on all the scree slopes.
TIP: Because it’s a full-day excursion, I cannot stress enough how important it is to leave early. September is the best month for undertaking this route, as the chances of afternoon storms are much lower than in July or August.
When to go: July – September
Via ferrata exposition: Variable
Map required: Tabacco Map no. 03 Dolomiti Ampezzane
Highest point: 2932 meters / 9619 feet
Parking: Bottom of the Rio Gere chairlift
Trailhead: Top of the Rio Gere chairlift
Nearest towns: Cortina d’Ampezzo

Getting to the trailhead
To get to the start of the approach hike for the via ferrata Ivano Dibona, you will first need to take a chairlift. During the summer, the lift remains open from the third week of June through the last week of September, providing a 3-month window to tackle the route.
TIPS: Be aware that the chairlift runs only between 8:30 and 16:30. This 8-hour window usually does not leave enough time to complete the entire route in one day. Since this route can be made into a loop, I recommend purchasing a return ticket to save money. The ticket stays valid for one week. If you are budget-conscious, you can also start the hike directly from Passo Tre Croci along path no. 203 al Rifugio Son Forca. This will add circa 300 meters (1000 ft) of elevation gain, 6 kilometres (3.7 miles) and a couple of hours to an already long day. I only recommend this option if you plan to stay overnight at Rifugio Son Forca.
By bus
Use public transport to reach the bottom of the chairlift. Bus no. 030, operated by Dolomiti Bus, runs from Cortina. The bus stop’s name is Rio Gere. The journey time is 16 minutes. Check schedules here or on Google Maps.
By car
The Rio Gere—Son Forca chairlift is a 15-minute (8 km) drive from Cortina d’Ampezzo towards Passo Tre Croci. An ample parking area is on the opposite side of the road from the chairlift. Follow the link for directions.
Stages of the via ferrata Ivano Dibona
Stage 1: Approach: Rifugio Son Forca to Forcella Staunies
- Distance: 2.4 km (1.5 mi)
- Elevation gain: 700 m (2300 ft)
- Time required: 2-2.5 hours

Brace yourself for a severe calf workout. There is a good reason why so few people nowadays choose Via Ferrata Ivano Dibona for their adventure. The approach is gruelling.
Start near the Son Forca hut and follow the dirt road to the old gondola station. From here, you will see a steep and narrow gully with old pylons where the gondola used to run. All you have to do is follow the gully up to the saddle. As you get higher, the slope becomes looser and looser. For every two steps you take, you slide down one.
After around 2 hours leaving the Son Forca hut, you should reach the Forcella Staunies. Slightly to the right, you can see the Lorenzi refuge, which closed its doors over 10 years ago. Be careful if you decide to explore the area. The terrace is decaying, and a few planks have become loose. If you fall, it’s a long way down.
A little winter room is adjacent to the refuge, where you can shelter should you become stranded in bad weather. However, there isn’t anywhere to get fresh water or use the toilet facilities. I stayed in this winter room when tackling the nearby via ferrata Marino Bianchi.
The Staunies saddle is the perfect place to put on your via ferrata gear. Soon, the cables will begin.
Stage 2: Via Ferrata Ivano Dibona:
- Distance: 3.7 km / 2.3 mi
- Elevation gain: 100 m / 330 ft
- Elevation loss: 740 m / 2430 ft
- Time required: 3.5-4.5 hours


From the saddle, the path climbs up the metal stairs of the former gondola station. A spray-painted sign points towards the via ferrata Ivano Dibona.
The whole location is a bit eerie, and I am unsure how long those stairs will be accessible to the public. The lack of maintenance in the last few years is showing.
After a couple of minutes, you will reach a ladder marking the start of the climbing section. Follow the cables and the red-painted marks, then pass some short tunnels dating back to World War I. You will reach the iconic suspension bridge 15-20 minutes after leaving the Staunies saddle.
Cross the bridge and climb the long ladder to a little summit. This is a perfect vantage point to snap some photos of the bridge. Here, you will get a fantastic 360-degree view of your surroundings, including the famous Tre Cime peaks. Make sure to download the Peak Finder app. It’s an excellent tool to learn the names of the peaks around you.
From the little summit, continue hiking along the ridgeline, where the cables stretch continuously. Thanks to the fantastic views, this is my favourite part of the ferrata.
The summit of Cristallino D’Ampezzo, where you can get an excellent view of the scree gully where you hiked before, is well worth the 15-minute detour.
Continue the hike down to Forcella Grande, then straight towards the ruins of a World War I barracks. Follow the cables as they stretch intermittently along the route until you get to the next saddle: Forcella Alta.
TIP: If the weather turns bad, use the emergency exit route starting at Forcella Grande. It will take you approximately 90 minutes to get back to Rifugio Son Forca.
This is where the signs stop, and you must pay attention to avoid missing the turn-off, as I did. Having a good map or GPS will undoubtedly help. Unfortunately, my GPS flew off into the gully a few hours earlier as I was gearing up. I call it a work hazard. Nowadays, I wear a GPS watch on my wrist.
From Forcella Alta, you have to descend a scree gully. Next, you’ll follow the route along ledges and platforms built into the rock wall until you reach Buffa di Perrero Bivouac. This is a deceptively easy part of the ferrata, but it is very exposed in places, so always stay clipped in.
From Bivouac, keep following the spray-painted arrows marking the route until you eventually begin a sharp descent along an unpleasant scree path. There are still some sections with cable, so keep your gear on. This is a real knee-buster after already walking for a few hours. Your legs will be tired.
Stage 3: Return to Rifugio Son Forca
- Distance: 2 km / 1.3 mi
- Elevation gain: 160 m / 525 ft
- Elevation loss: 150 m / 490 ft
- Time required: 1 hour

Eventually, you will reach a forest. To the left, you can spot the path leading back to Rifugio Son Forca. From here, it’s another 90 minutes to walk back, but at least the trees will provide some shade and cool air.
Make sure to save some energy, as the last 30 minutes before reaching the Son Forca hut are once again steeply uphill. Think about the ice-cold beer you can have at the hut. The last thing on the itinerary is to take the chairlift to the car park.

Overnight stay & dining possibilities
Rifugio Son Forca is a privately operated hut near the top of the Rio Gere—Son Forca chairlift station. Visit the website for the complete price list and to book. Staying overnight in the hut is an excellent idea if you want to start the via ferrata early in the morning. This is what my friend and I did.
The second hut along the route is Rifugio Lorenzi (pictured above), located at the Staunies saddle. Unfortunately, this alpine hut has been out of operation for over 10 years now and, quite frankly, you shouldn’t go anywhere near it. Its slow decay makes it dangerous.
Recently, the alpine Bivouac Buffa di Perrero, located around halfway along the route at 2760 meters, was restored and converted into a shelter. It is a World War I structure built into a wall, making quite an impression. Shortly after its restoration, it was destroyed by an avalanche, then rebuilt to its current state. This is a self-sufficient bivouac, which means that you will need to carry all supplies with you to stay there overnight, including enough water, as there are no water sources nearby.
TIP: If you want to know more about the whole hut business in the Dolomites, jump to this article.
Where to stay nearby
Via ferrata Ivano Dibona is located in the Monte Cristallo range in the centre of the Italian Dolomites. The nearest town where you can base yourself is Cortina d’Ampezzo. Below are a few of my recommendations for hotels and lodges in Cortina.
Read more: Guide to Cortina D’Ampezzo: Best Hikes, Via Ferratas & Photography Locations.
Best Value
A welcoming, family-run hotel just a 10-minute walk from the centre of Cortina d’Ampezzo, offering comfortable rooms, mountain views, private parking, and a delicious breakfast surrounded by the spectacular Dolomites.
Top Rated
This hotel combines traditional alpine warmth with contemporary design, offering stylish accommodation, wellness facilities, excellent dining, and spectacular views of the Ampezzo Dolomites.


Other activities nearby
Travel resources for the Dolomites
Shop my via ferrata gear essentials

Black Diamond Helmet
Rockfall is a significant concern on via ferrata routes. Unbeknownst to you, other climbing groups above you may accidentally dislodge a small rock and send it down the mountain. If it hits you on the head, it could have serious consequences. A helmet on your head (not inside your backpack) is necessary.
Shop on: Amazon (Worldwide) / Backcountry (US)

Black Diamond Momentum Harness
Another must-have on a via ferrata route is a climbing harness. A harness works as an anchor point for your via ferrata lanyard. Try it before your trip to ensure it fits snugly without limiting your movements. Aim for a lightweight harness that will be comfortable to wear between the cable-protected sections when hiking.
- Shop Women’s on Amazon (Worldwide) / Backcountry (US)
- Shop Men’s on Amazon (Worldwide) / Backcountry (US)

Edelrid, Camp or Black Diamond Via Ferrata Lanyard
A via ferrata lanyard connects the climber and their harness to the cables along the route. Its two arms and a hidden extra coil work as an energy absorption system in case of a fall. The two carabiners at the end of the lanyard clip into the cable. Make sure the carabiners are equipped with the palm squeeze mechanism. It’s the safest and most comfortable.
Shop on Amazon (Worldwide) / Backcountry (US)

Black Diamond Crag Gloves
The gloves protect your hands from cuts and scratches you may otherwise get if you haul yourself on the cable without them. I prefer full-finger gloves for extra protection against blisters. If your hands sweat quickly, go for the fingerless version.
Shop on: Amazon (Worldwide) / Backcountry (US)

Salewa Wildfire Edge Approach Shoes
This is my go-to pair of hiking shoes for more accessible trails or via ferrata, where I don’t need extra ankle support. They provide excellent grip on the rock and are very durable.
Shop on: Amazon (Worldwide) / Backcountry (US)
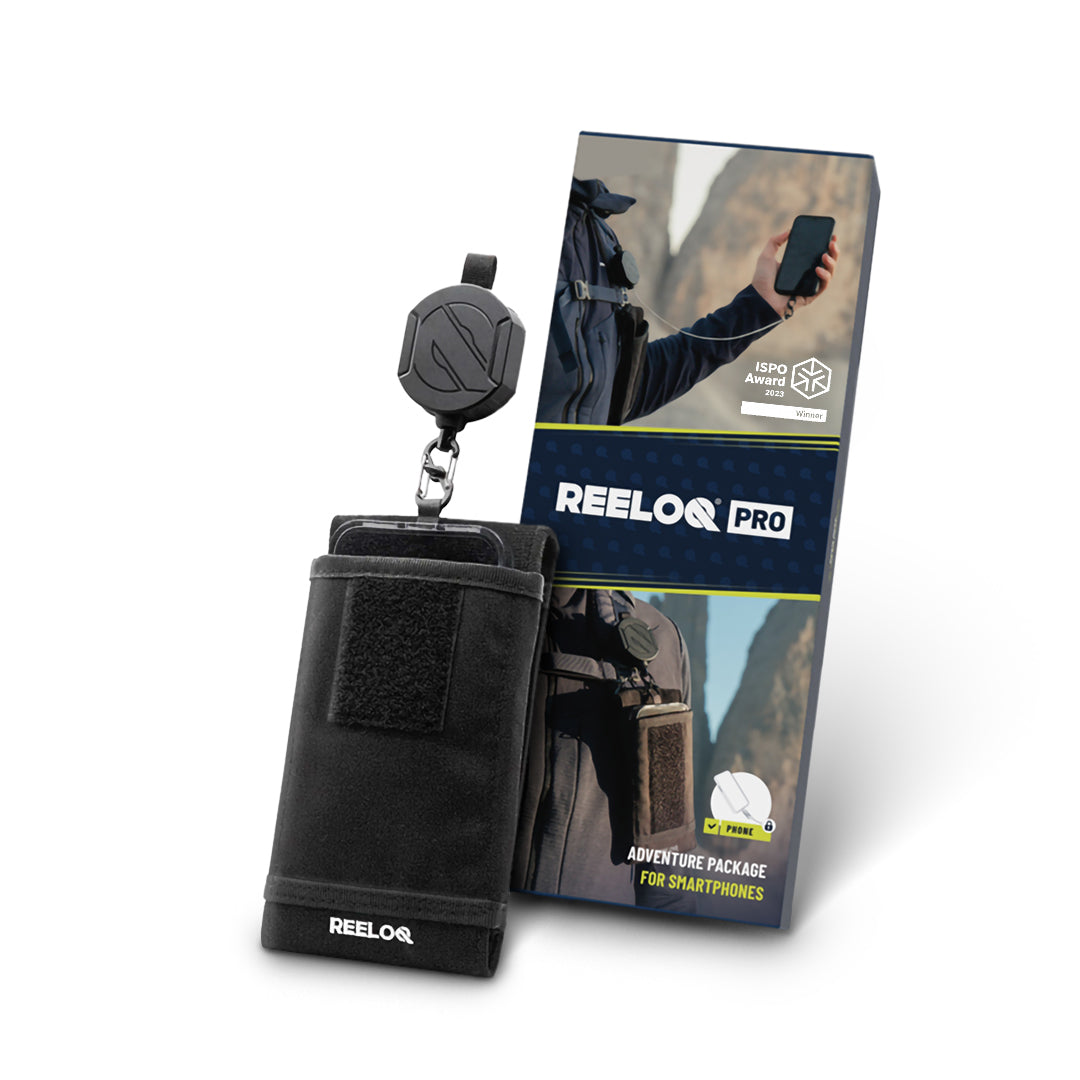
Reeloq Smartphone Securing System
If you want to take great photos on a via ferrata without worrying about losing your phone, Reeloq is the best tool for it. It’s a smartphone-securing system that allows you to use your phone on any adventure. This has been a great addition to my tool arsenal.
Shop on: REELOQ
Other hikes and via ferrata near Cortina D’Ampezzo
More travel and hiking resources in the Dolomites
- Photography spots in the Italian Dolomites
- Regions in the Italian Dolomites
- Itineraries for the Italian Dolomites
- Via ferratas in the Italian Dolomites
- Day hikes in the Italian Dolomites
- Hut-to-hut treks in the Italian Dolomites
Support my website!
Hi Reader! If you found any of my articles about the Dolomites useful please consider using the affiliate links below (at no extra cost) when booking your holiday. Thank you
- Reserve your hotel with Booking.com
- Book your rental car with Discover Cars
- Buy your outdoor gear with Backcountry.com (US readers)
If you have any questions, leave them in the comments below!
Hi, really great pictures!
We did it this Sunday and was really epic!
On reflection, both directions seems good to me, esp. considering going down narrow gully from Forcella Stauniesto cable car is much faster and comfortable (then going up).
Hi Darko. Thanks for visiting and for your input. I am glad to hear you had a great time. I hope your comment helps others decide which way to go.
With inspiration from above article me and my 14 year old daughter did this roundtrip in 2024. Its still one of the best memories I have with her. We did it in two days, sleeping in Bivacco Buffa di Perrero. Im the proudest dad seeing her tackle this.
Hi Daniel. I am so glad to hear you followed my guide and tackled the Ivano Dibona. I too hiked with my dad through the Dolomites and will cherish those memories forever.
Amazing website! How difficult is this ferrata?
Hi Sam. Thank you. It’s all answered in the text 😉
Hi Marta, ur site so cool and thanks for the info. I’ve seen maps with your route but in the other direction, trying to understand the difference… Going down the scree gully I would think is easier than going up.
Hi Chuck. Thanks for stopping by. Since it is a circuit you can go either way. I wanted to be at the bridge really early in the morning. As for the scree gully whether it is easier going down that’s debatable. The rocks are quiet large so running down that scree can be dangerous.
Hello Marta,
My name also is Marta. I stumbled across your website by chance, this particular piece of it. It seems you have a fascinating life and passion. Blessings to you, Marta
Hi Marta! Nice of you to leave this feedback. Happy travels to you!
We just returned from an attempt to do this VF. The chairlift to Son Forca is still not operating so we had to walk up there. However when we reached the top Forcela Staunies we found out that there was so much snow that we returned back. After much disappointment. So my question is- how one can check that the ferrata is passable and that the snow doesn’t cover the iron rope? Thanks
Hi Pavlos. Yes, I talk about it quite a lot that hiking in the Dolomites (or any mountains in the Southern Hemisphere) doesn’t properly kick off until the third week of June, and northern slopes even July. That’s when the chairlifts and huts open. Best way to know is to study maps. Southern slopes which are exposed to the sun are free of snow much sooner than the Northern slopes. You never however get a 100% guarantee.
Hi Marta,
First of all, I did a trip to the Dolomites Sept 2023 using your blog and it was incredible, so thank you.
I’m heading back this June, unfortunately quite early season (arriving there 16th) and would be hoping to do this VF probably around the 20th if it’s accessible then. Is June as bad for afternoon storms as July & August. We are trying to figure out if it’s even worth attempting it at this time of year. Thanks again!
Hi Paula. Thanks for visiting. Yes, the storms are already there in June. You have to check the weather the day before heading out anyway, so that’s your best bet. I stayed in Rifugio Son Forca the night before to be able to start really early (5AM) That way not only you get fantastic views, but also you will be done with the via ferrata sections by early afternoon.
I hope that helps!
Hello,
I have a new question but it doesn’t concern the via ferrata. Do you know if the dismesso Lorenzi refuge, which is on the via ferrata, is open?
Have a nice day.
Thomas
Hi Thomas. I do talk about the decaying state of rifugio Lorenzi in the text;) No, the hut has been closed since 2016 and has been in a decaying state since.
Hello, thank you for this article.
I want to do a multi-day hike in the dolomites next summer with some friends. The bivuac buffa di ferrero would be our first stop. Do you know if it has been renovated? And is it possible to go there without all the necessary via ferrata gear (helmet, harness, …)?
Thanks again for this article.
Hi Thomas. Thanks for visiting. After your comment, I did a quick check and yes it has been renovated and set up as a Bivouac. When I did the VF Ivano Dibona it was a place that was falling apart and was often used as a toilet (it stank of pee). I am glad to see it has been renovated and put to good use. It’s amazing. Now for your question. No, you should carry Via ferrata gear with you. Whilst I sometimes see some daredevils without the gear on via ferratas I have personally learned on my own skin that all it takes is one wrong step and the next thing you know there is a mountain rescue operation underway and someone has to risk their own lives to save yours. Insurance might not cover any accidents if they learn that you were not properly equipped. So with that said, have fun and stay safe! Let me know if you have more questions!
Thanks you for the quickly answer.
Hello! I’m planning on doing this route in September. I’d like to do a link up of Cristallo and Ivano Dibona.
A few questions:
– Is there ANY other place I can park my car to start earlier without an overnight stay at the rifugio? ( For example, can I just park at San Forca, instead of the lift?)
– If not, is my only choice to start really early, an overnight stay at the rifugio the night before? If so, what happens if I miss the cable car down?
– During the decent of Ivano Dibona, would it be faster to turn around when the route gets boring (I’m guessing at the start of the forrest) and go down via the scree path to the rifugio?
– alternatively, are there any intersections with a main road at which point I can get a taxi back to the car park?
Thanks!!
Amrutha
Hi Amrutha! Thanks for stopping by. September is when I did it too! As for your questions:
1) No, I am afraid you can’t drive up to rifugio Son Forca.
2) You can do via ferrata Ivano Dibona in a day, but not if you want to connect it wil via ferrata Marino Bianchi. However if you do Marino Bianchi only and then just a short trip to Dibona (for example to the bridge and back) you can do it all in a day which means taking the cable car up first thing in the morning, then hike/ferrata then back to the chairlift and ride it down to the car.
3) I don’t exactly know what you mean with the route getting boring once you get down to the forest. Once you make it down to the forest you are pretty much 80% in and all you have left is to hike back to the refuge. If you mean to use the escape route after the bridge, then sure you can do that, but you will be missing out on seeing the mountain refuge dating back to WW1, which was built into the wall,
4) no I am afraid not. You can hike to Hospitale but from there is quite the bus journey back to Cortina and then up to the parking for the chairlift.
I hope that answers it for you. Let me know if you have more questions!
Hallo,
ich finde leider keine genauen Öffnungszeiten für den Lift zum Klettersteig. Ist dieser aktuell geöffnet? Haben Sie evtl. auch einen Link für mich mit weiteren Infos. Danke 🙂
Hallo. Die Rio Gere-Son Forca chairlift offnet am 18/06 und bleib offen bis 18/09 in diesem Sommer Saison. Dolomiti Superski is eine gute Webseite wo man alle offnungszeiten von chairlifts sehen kann.
The guided time you gave is around 8 hours for the via ferrata, I take it this includes the hike from Rifugio Son forca up the screen gully or is the 8 hours starting from Refugio Lorenzi, ie, after the screech gully?
Hi Wilde. Thanks for stopping by. This is for the entire route from start to finish (Son Forca to Son Forca).
Hi, if we just wanted to do the hike to the famous suspension bridge and head back – how long would that take?
Hi Shailesh! Thanks for stopping by. It takes around 2 hours from rifugio Son Forca to Forcella Staunies. Then from there to the bridge is another 30 mins (includes scrambling on cables so you will need the VF equipment). To get back down it will be ca. 90 mins. A total of around 4 hours. I hope that helps!